About two weeks ago, one of my coworker recommended me Hugo to me. I immediately like it and chose to start my blog again with it as my blogging engine. After some reading and experiments I finally set it up and was able to:
- integrate it with Tranquilpeak theme,
- host the site on Firebase Hosting, and
- configure Gitlab CI to compile and upload content whenever I push changes to gitlab.
I will walk through how I set up hugo and share some tricks I found in this post.
Why these componets?
Let’s talk about why I chose Hugo, Tranquilpeak, Firebase Hosting, and Gitlab.
Hugo
- supports Markdown (very important)
- compiles content statically (fast when viewing the content)
- supports local server (so that you can preview the result locally and host the site anywhere)
- has many plugins and themes (you choose how your site looks)
Firebase Hosting
I started with Github Pages but ended up with Firebase Hosting. I also thought about Amazon S3, but it’s only free for first 12 months. (see pricing)
Firebase Hosting has these adavatages:
- Free for Spark level (1GB storage and 10GB bandwith per month)
- Supports custom domain and SSL
- Built-in CDN worldwide
- Has Firebase Tools to help you upload content via command line
Tranquilpeak
- Fully responsive
- Supports Google Analytics
- A beatiful about panel (nice for personal blogs)
- Github syntax highlighting
- Excerpt and Table of Contents
Gitlab
- Unlimited private repos
- Native supported CI with pipeline and docker
- A very transparent company. lol (see this)
Setup your site step by step
Basic Hugo
I followed this toturial Hugo Quickstart Guide, and it’s pretty basic and comprehensive for setting up the new site.
Short version:
| |
Tricks here are:
- your content will not show up if you don’t specify the theme
- images may not display properly if your baseURL is not set correctly
Tranquilpeak theme
You can reference the sample config.toml from the github to setup the theme.
Some notes:
- you must configure the side menu first to see the site properly
- the Disqus panel will not show up at your local machine
- the background image of menu is set by attribute
coverImageand it can be a full http URL
Firebase Hosting
After writing your content you can preview the output locally by using hugo server -t <name-of-theme> and then browse to http://localhost:1313
If you are happy with result you can compile the content using hugo -t <name-of-theme> and the compiled content will be generated in public folder.
Now it’s the time to setup Firebase.
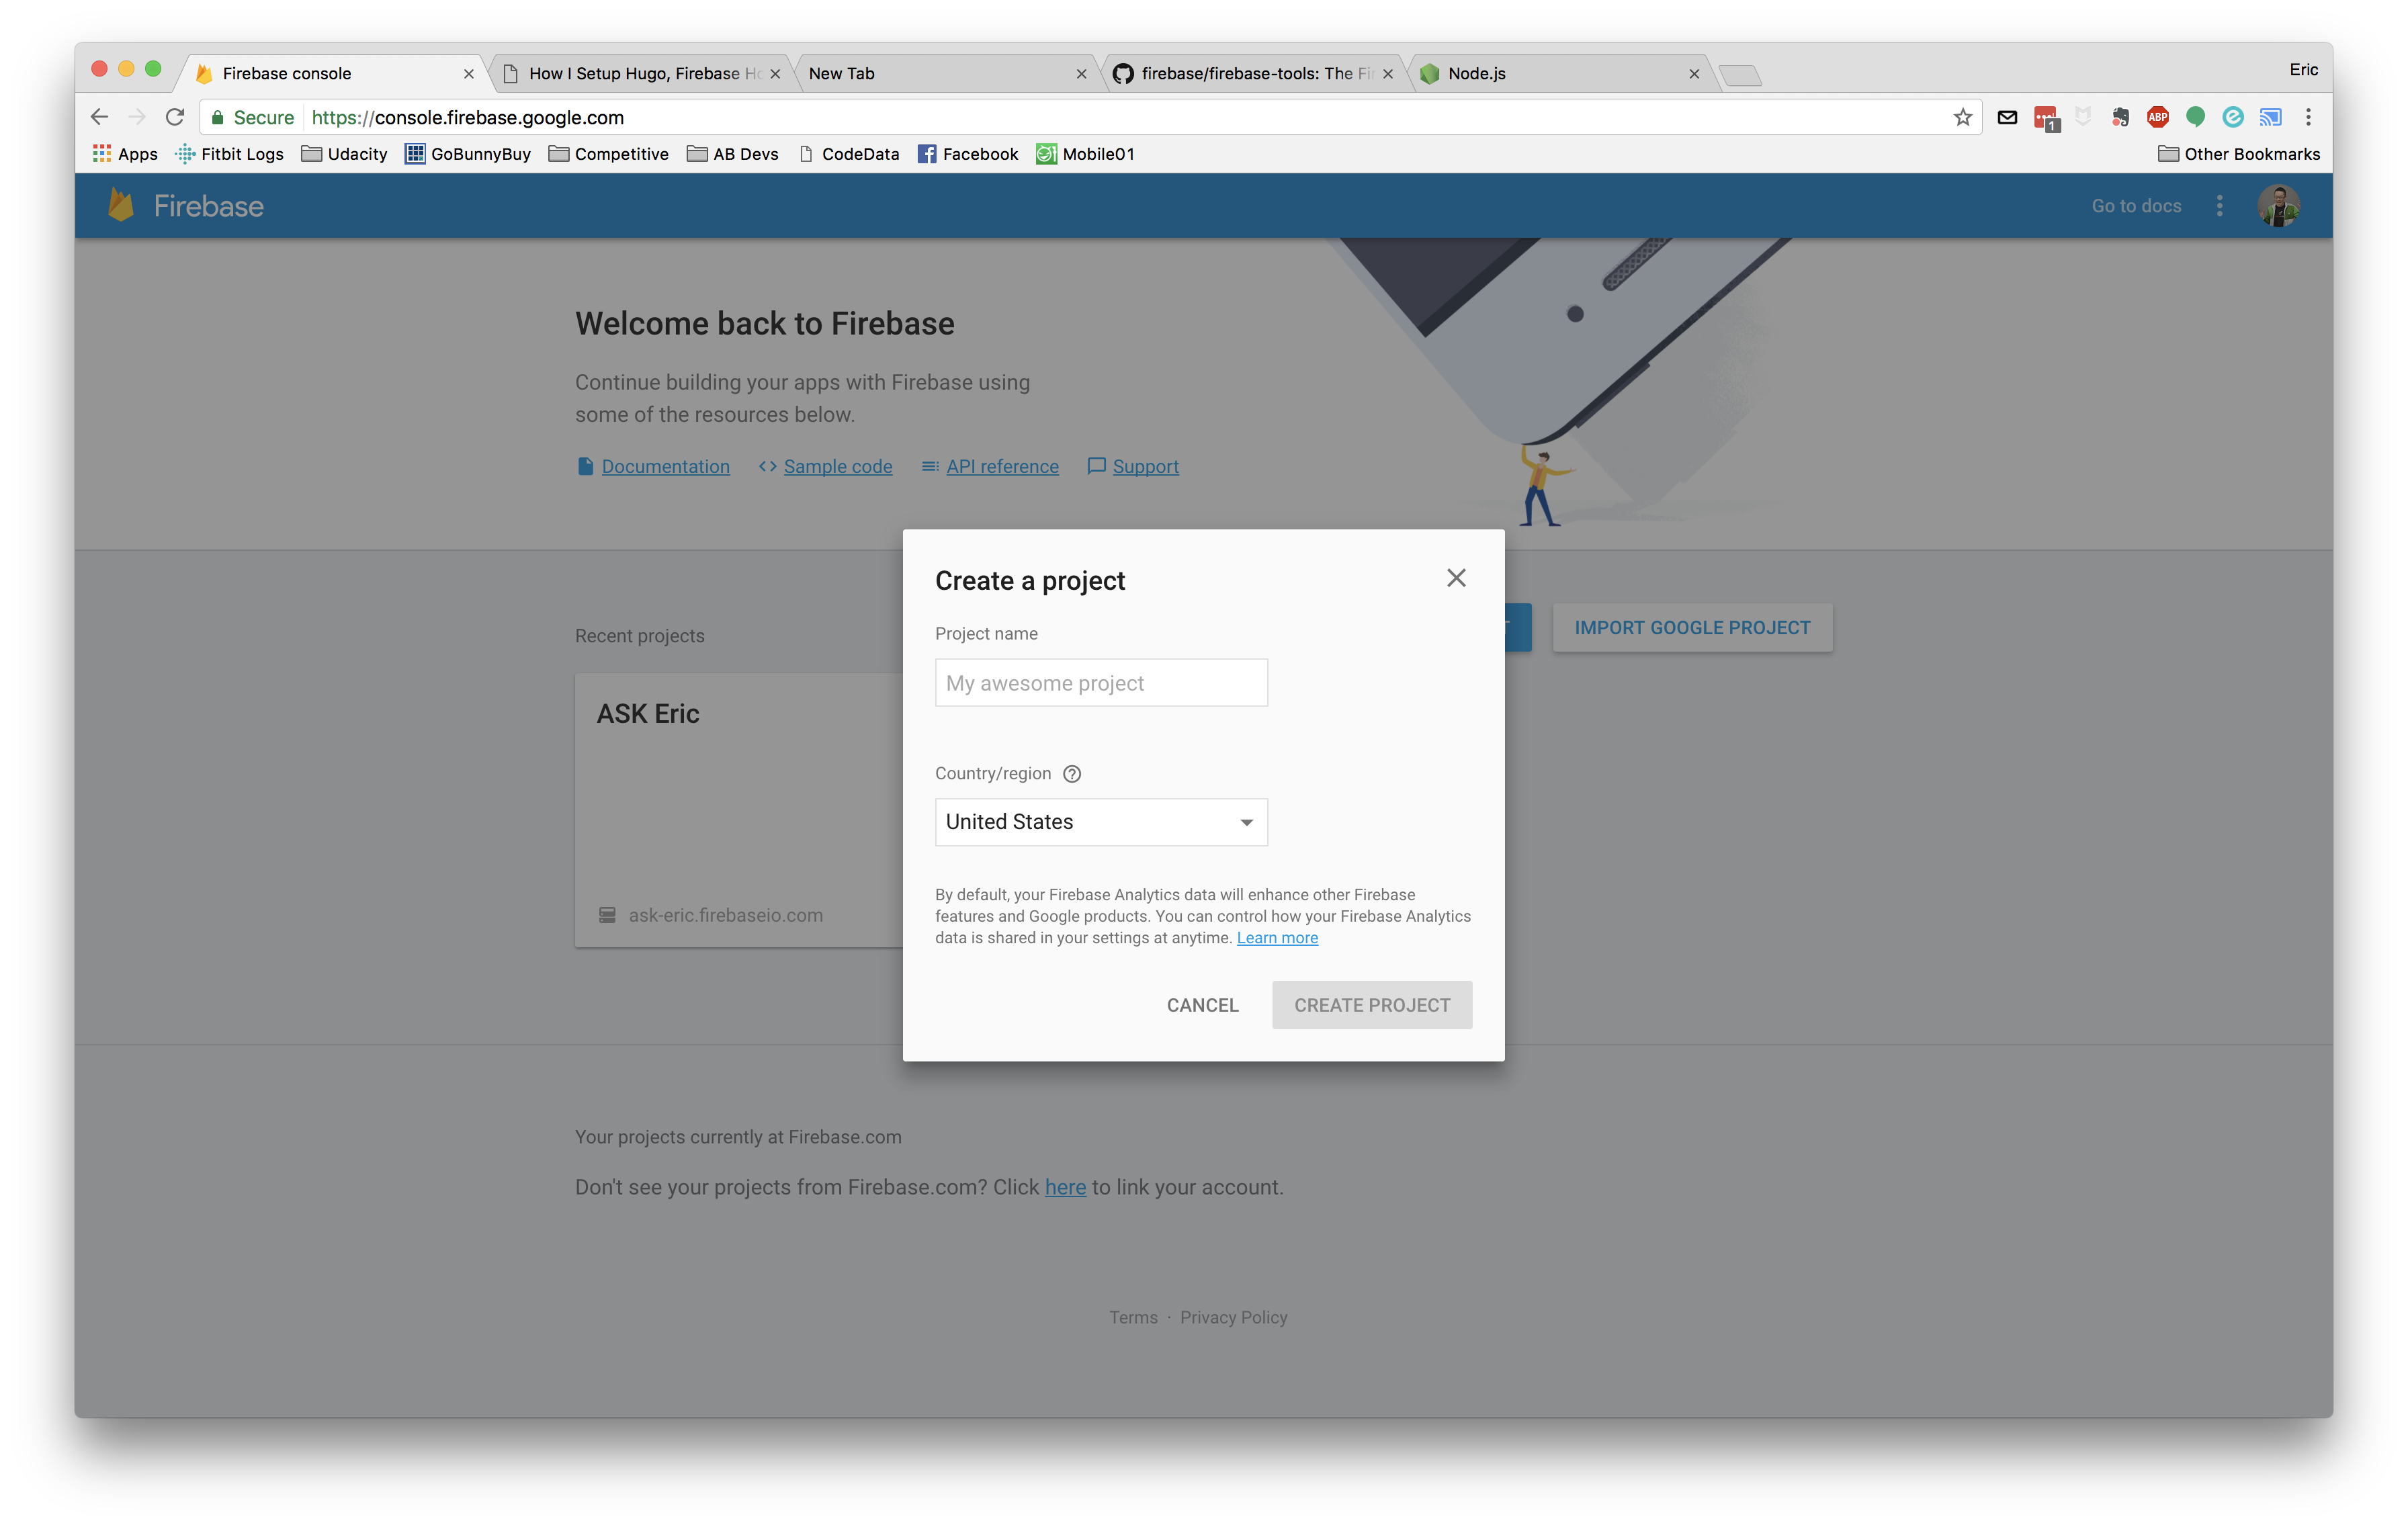
Create a new project
Log into Firebase Console and create a new project.
Install Firebase CLI Tools
The firebase tools allows us to upload content directly via command line so that we can easily automate the process.
To install the tools, enter the following command:
| |
Initialize project directory
Just like git repositories, firebase projects have to be initialized before you can deploy (upload) the content.
You can simply type firebase init to initialize the directory. It will ask you some questions regarding your project, you can configure it differently or just use the default values.
Remeber to use public diretory as the public directly since hugo generates content in that directory too.
| |
The init command will generate a firebase.json similar to
| |
Make sure you commit this file into your repository. Otherwise you might have to intialize the project everytime you want to use firebase.
Deploy Content
Once you review your content and compile your content locally, you can deploy the site to firebase using firebase deploy. But before you can actually do so, you need to login to firebase by firebase login. It will ask you for username and password.
| |
Configure Gitlab CI
Gitlab provides shared CI runners for all repositories including your private repos! You can read the full documentation to learn how to configure CI.
But for our use case, you can reference my .gitlab-ci.yml:
| |
Some notes here:
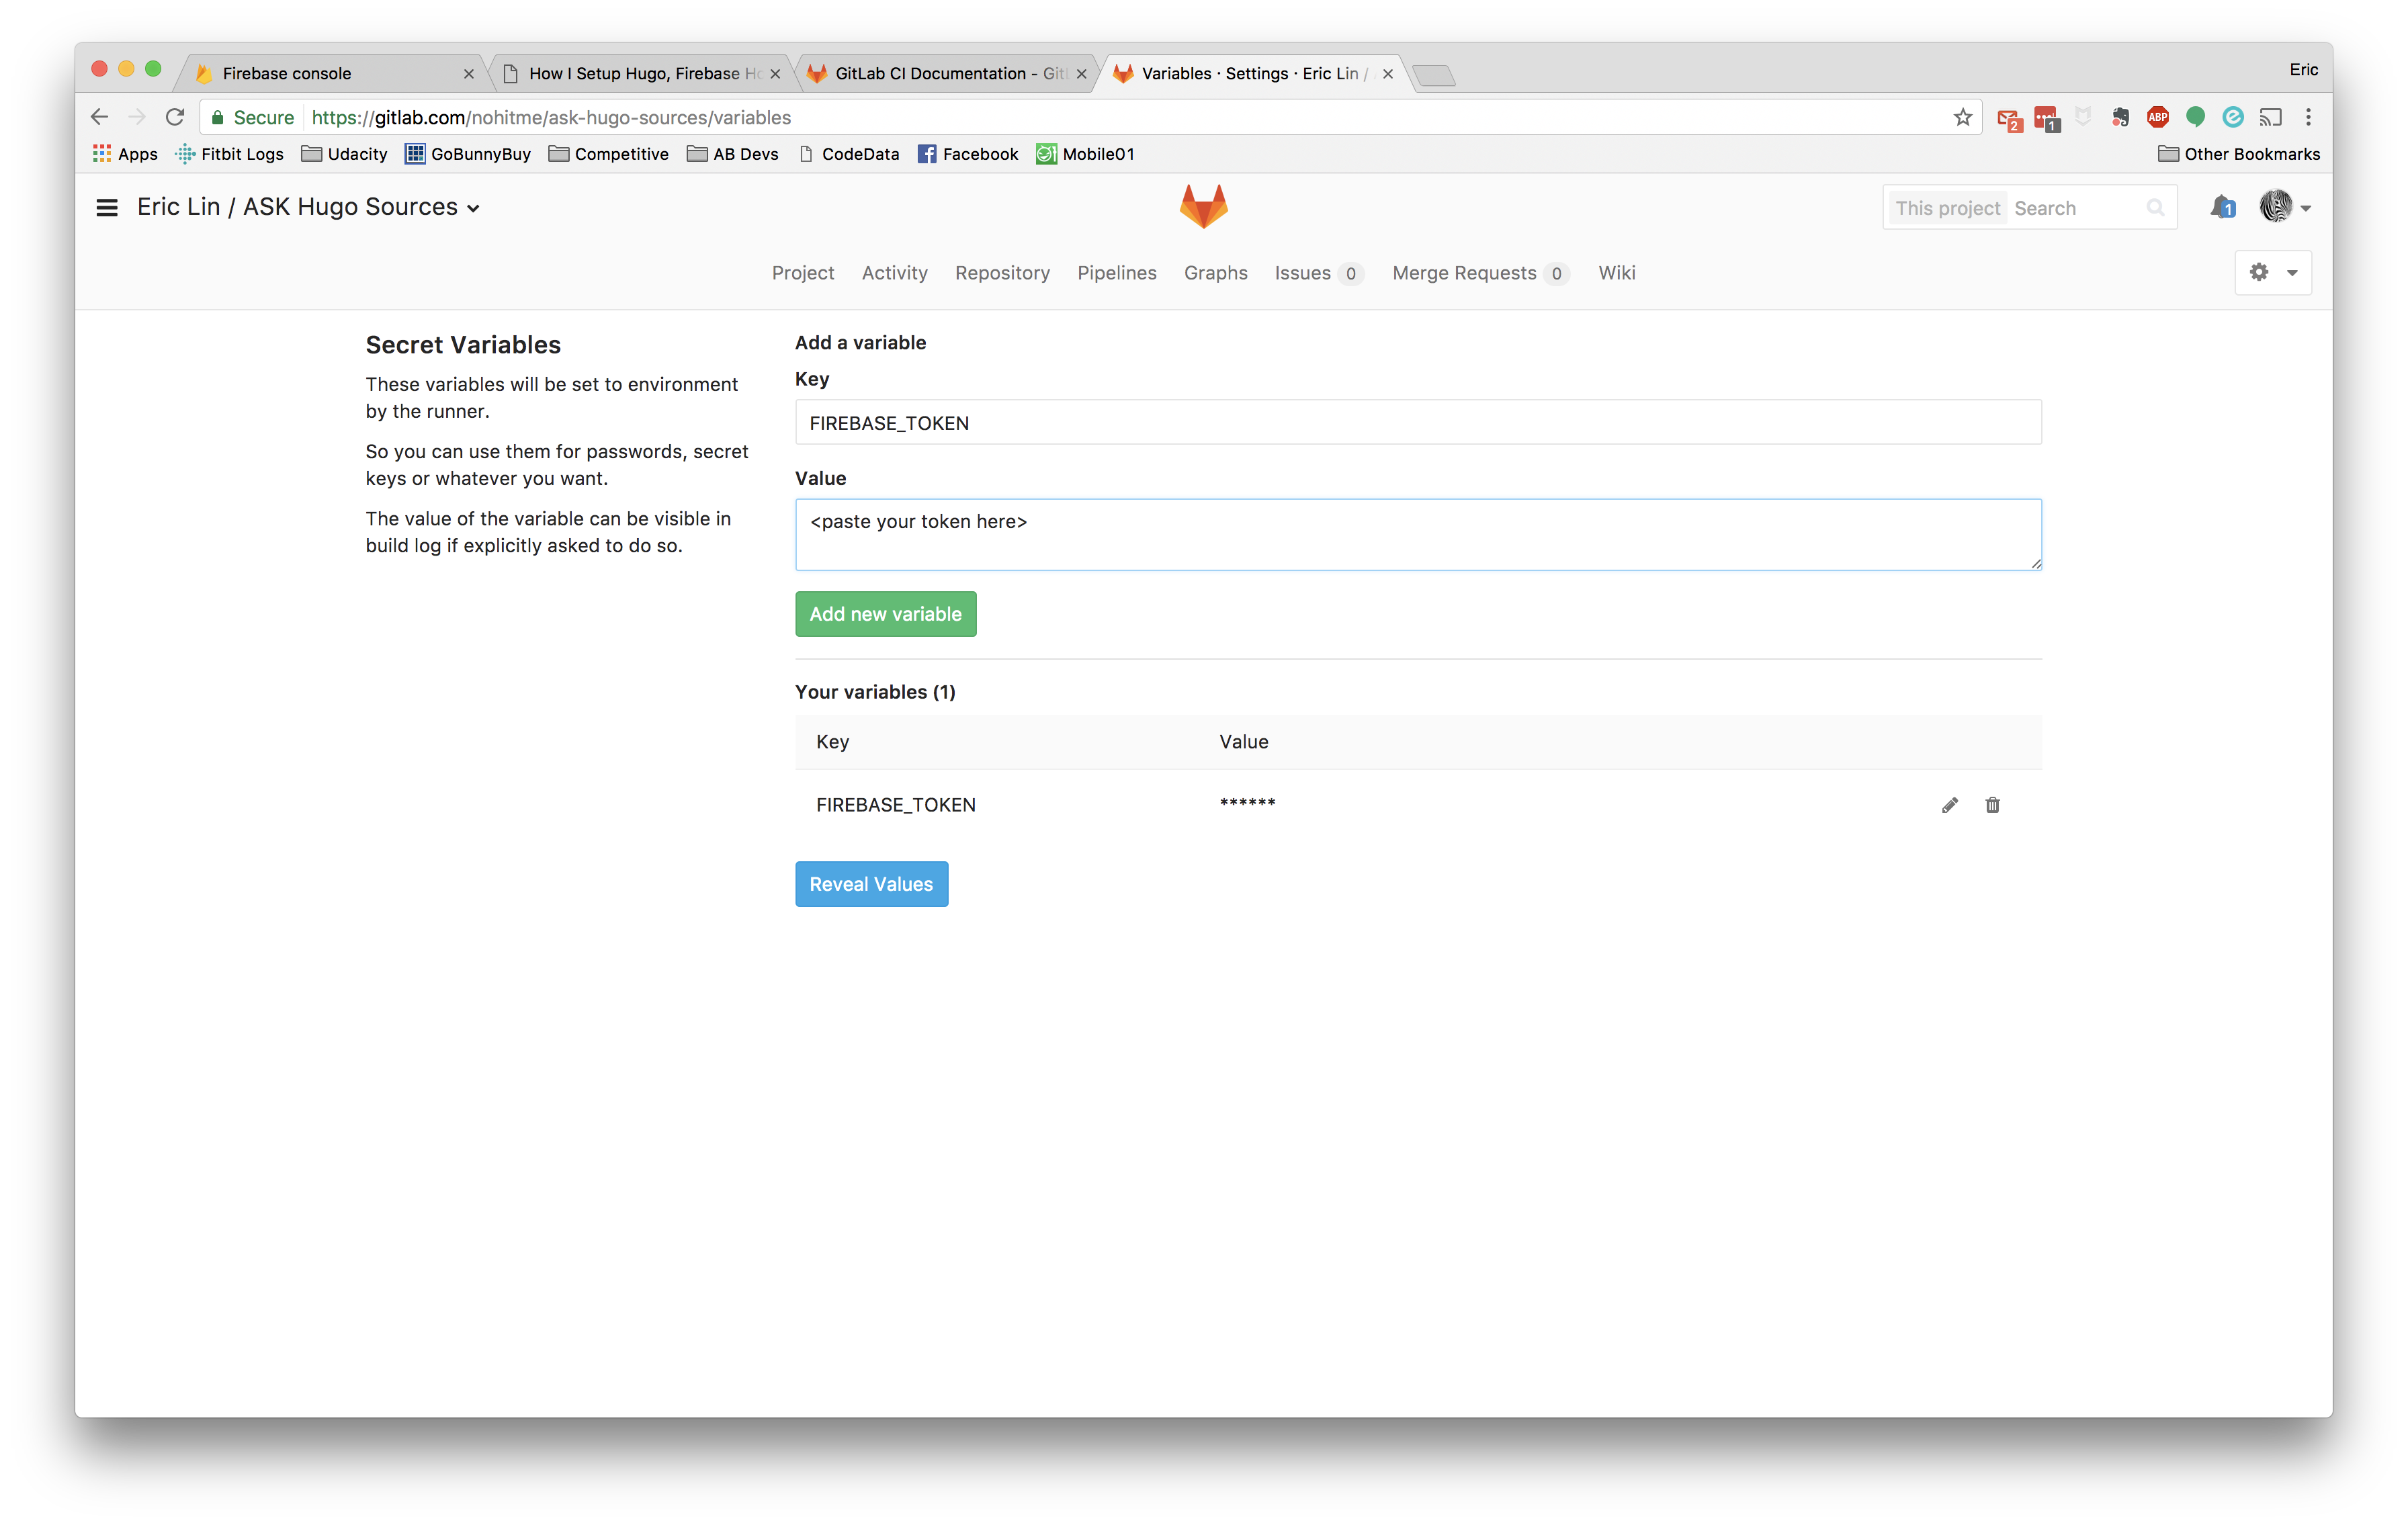
GIT_SUBMODULE_STRATEGYis required if you use submodule to clone the latest theme from other git repo.GIT_SSL_NO_VERIFYhas to be true if you try to clone other repository from anywhere other than gitlab itself (i.e. github)image: nohitme/hugo-firebasethis is the docker image I created. It has both hugo and firebase tools installed so that I can compile and deploy content directly. Feel free to use it.FIREBASE_TOKENis the token you will need to generate via firebase tool and assign this variable into gitlab before you run the job.only: - masteris to ask CI to run only on /master branch
Generate FIREBASE_TOKEN
To generate the token, you type firebase login:ci
| |
To assign this token in gitlab CI’s environment variable:
Login to gitlab and click settings -> variables
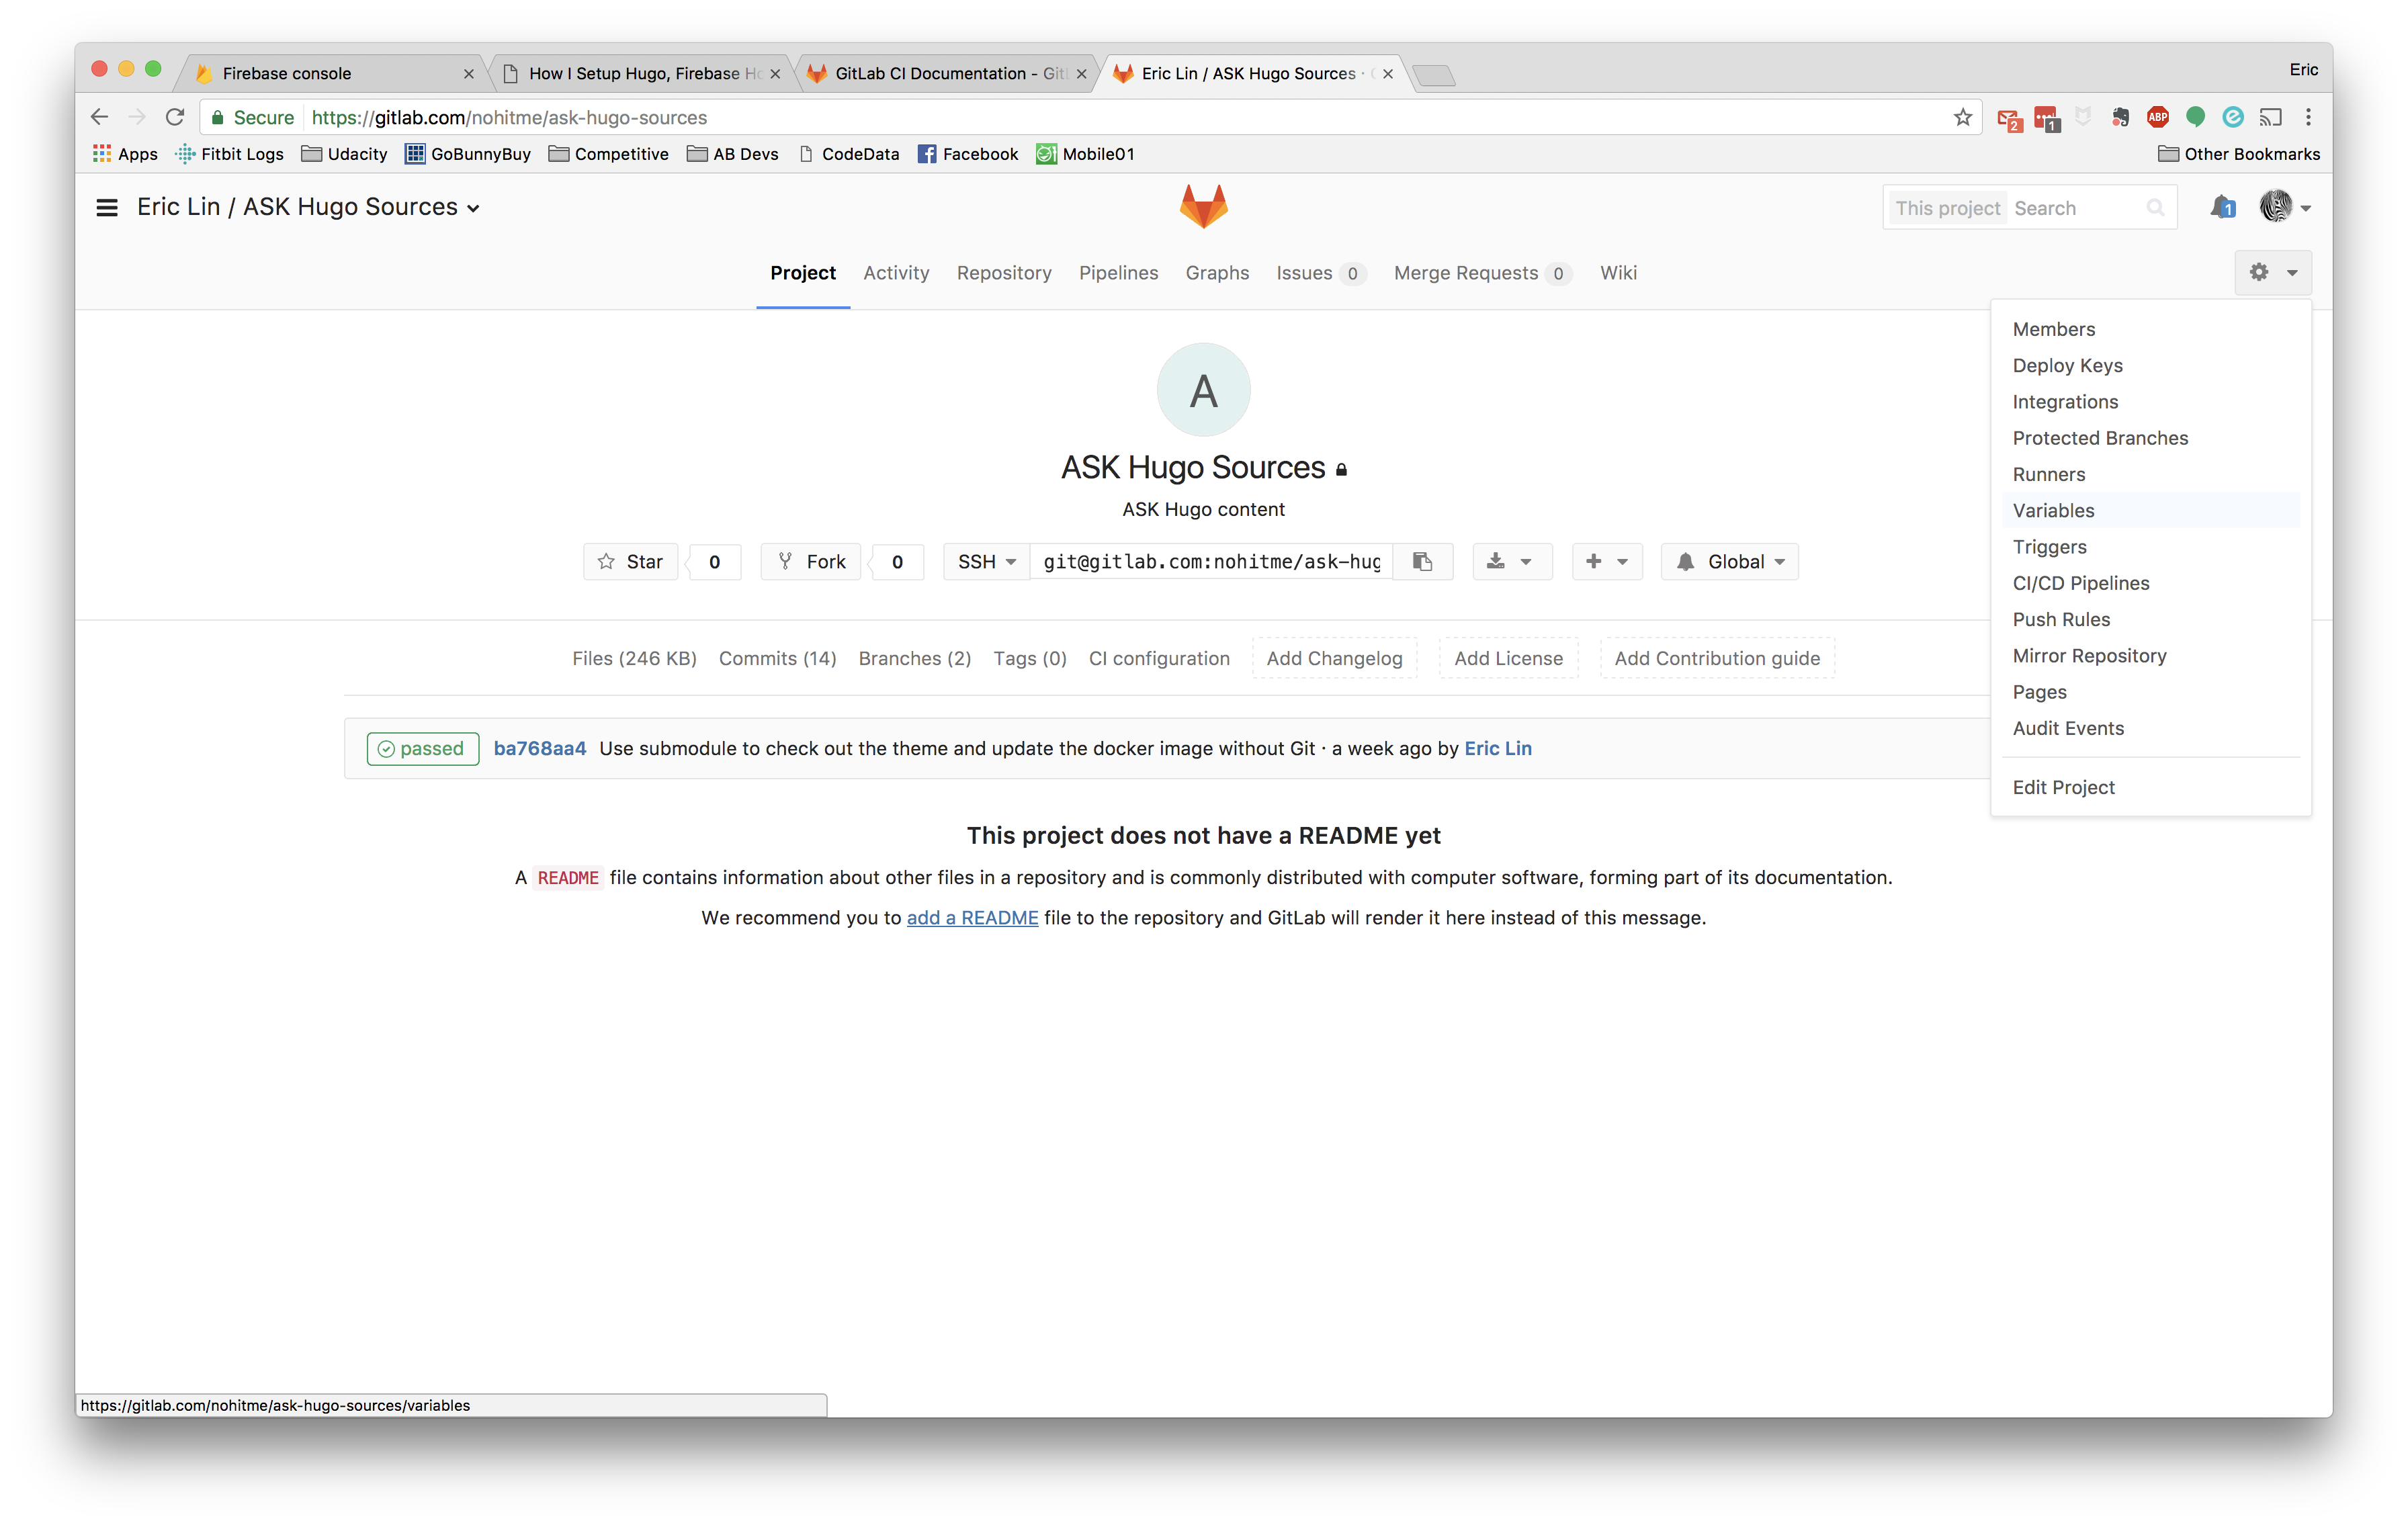
Enter the name and value of the variable
At this point, you shoule be able to push changes to /master branch and see your deployment automatically!
Conclusion
I think so far Hugo has been fun and the best personally blogging tool in my opinion. It has many documentation and online tutorials. It is also being actively supported in terms of development and themes. Also gitlab and firebase make the deployment easy and fast. Hopefully this tutorial can help you set of your personal site easily and quickly too!